
Milk Carton Woolly Mammoth
Here’s a simple craft idea for teachers, home educationalists and museum staff who want to teach about Ice Age prehistoric animals. A plastic milk carton can be turned into a Woolly Mammoth model.
A Milk Carton Woolly Mammoth Model
Making a Woolly Mammoth out of a milk carton.
Picture credit: Everything Dinosaur
Visit Everything Dinosaur’s website: Everything Dinosaur.
A Woolly Mammoth Model
This is a simple and fun to make Woolly Mammoth model and would be a great activity for Key Stage 1 or Lower Key Stage 2 children to try.
What You Will Need to Make a Milk Carton Woolly Mammoth
- Empty plastic milk cartons (washed out to remove any milk residue)
- Pair of round ended scissors
- Pencil and black highlighter pen
- White card or paper
- Paints
Taking your milk carton, carefully cut it into half, using the handle as a guide. The handle will form the trunk of your Mammoth so cut the handle first then cut around the rest of the carton about two centimetres lower down the carton. This will ensure that your Mammoth’s trunk will be raised off the ground.
What You Need to Make a Milk Carton Mammoth
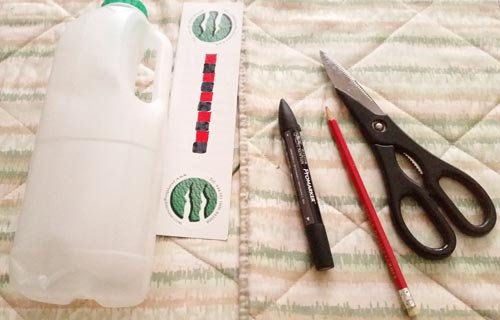
Tools required to make a milk carton Mammoth.
Picture credit: Everything Dinosaur
A Milk Carton Woolly Mammoth Model
Once the milk carton has been cut, then simply cut two tongue-shaped slots on the widest part of carton, these will make the legs. Use a pencil to sketch out where the cuts will be made and then go over the pencil line with the black marker pen to give you a distinctive shape to follow as you cut. Finally, cut a third tongue-shaped slot on the back of the carton, this slot will help to form the back legs. If you want, you can cut a small “V” shape at the top of this slot, you can then bend this plastic out to make the Woolly Mammoth’s little tail.
The Milk Carton Woolly Mammoth Begins to Take Shape
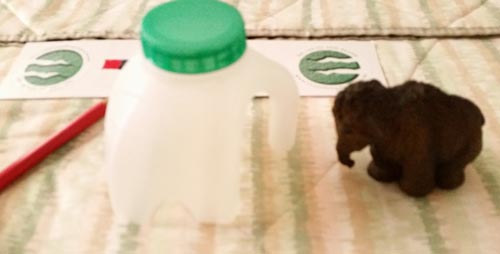
Woolly Mammoth takes shape (milk carton).
Picture credit: Everything Dinosaur
Once the legs and tail have been cut out, simply paint the carton a sandy, brown colour to mimic the shaggy Mammoth coat. Add the eyes, (draw on the tail, if you have not cut out a “V-shaped” slot at the back), and add the five rounded nails on each foot. You can mark the area of the ears as well. Remember, Woolly Mammoths had relatively short ears compared to those of modern elephants (an adaptation against the cold).
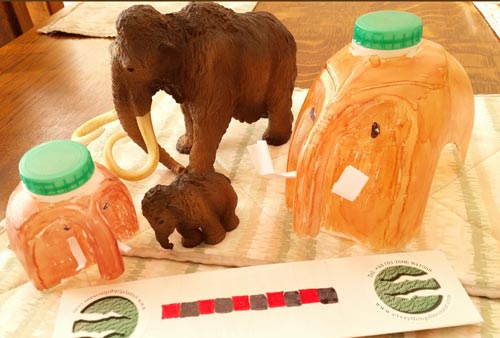
Build Your Own Herd of Woolly Mammoths

Build your own herd of milk carton Woolly Mammoths.
Picture credit: Everything Dinosaur
Adding the Tusks
To finish off your Woolly Mammoth cut two small holes either side of the trunk and then slot in a piece of white card or paper to make the tusks. Don’t forget to bend the tusks upwards a fraction and there you have it, an easy to make milk carton Woolly Mammoth, a super craft idea to support teaching about Ice Age animals and life in the Stone Age.
Different sized milk cartons can be used to make different sized members of your Mammoth herd.
For models and replicas of prehistoric animals including Woolly Mammoths: Papo Replicas of Prehistoric Animal Models.


Leave A Comment